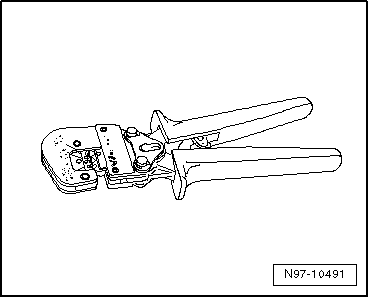
Volkswagen Touran Service Manual: Crimping Pliers - .35-2.5mm -VAS1978/1A
| The Crimping Pliers - .35-2.5mm -VAS1978/1A- or the Wiring
Harness Repair - Crimping Plier - Base Tool -VAS1978/1-2-
together with the Wiring Harness Repair - Crimping Head -
.35-2.5mm -VAS1978/1-1-, or the Wiring Harness Repair Set -
Crimping Head - 4-6mm -VAS1978/2A- from the wiring harness
repair set is used to compress the crimp connectors. |
| Crimp connectors, pressing using the Crimping Pliers -
.35-2.5mm -VAS1978/1A-. Refer to
→ Chapter "Wire Break with Dual Repair Point". |
| The following crimping heads are available for the Wiring
Harness Repair - Crimping Plier - Base Tool -VAS1978/1-2- |
| Crimping Head 0.35 mm 2 - 2.5 mm
2Wiring Harness Repair - Crimping
Head - .35-2.5mm -VAS1978/1-1- |
| Crimping Head 4.0 mm 2 - 6.0 mm
2Wiring Harness Repair Set -
Crimping Head - 4-6mm -VAS1978/2A- |
| Wiring Harness Repair Set - Crimping Head - JPT
-VAS1978/9-1- |
| In conjunction with Wiring Harness Repair Set - Crimping
Head - JPT -VAS1978/9-1-, the crimping pliers are used to crimp
contacts onto individual wires when repairing wiring
cross-sections up to 0.35 mm2. Refer
to
→ Chapter "Wires with Cross Section up to 0.35 mm
2, Repairing". |
| Changing the Crimping Head |
| |
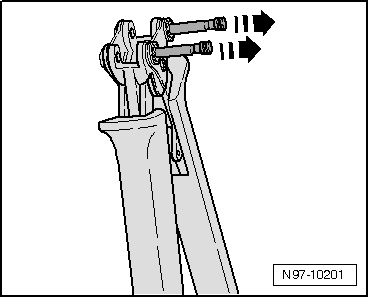
Open crimp pliers completely. |
|
|
|
| |
Disengage both locking pins in direction of
-arrows- from crimp pliers basic
tool. |
|
|
|
| |
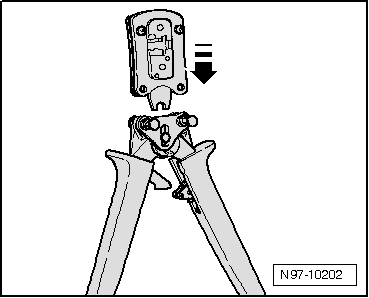
Insert the required crimping head from above
-arrow- in crimp pliers basic tool. |
|
|
|
| |
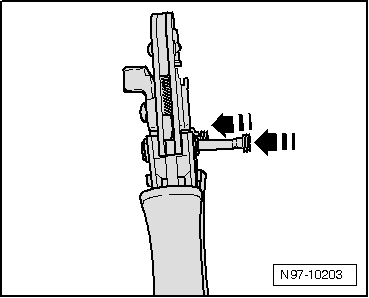
Lock the crimping head by pressing in the pins
-arrows- into crimp pliers basic
tool. |
|
|
|
Caution
When heat-shrinking crimp connections, be careful
not to damage any other wiring, plastic parts or
insulat ...
Note
Observe general notes for repairs on the vehicle electrical
system. Refer to
→ Chapter "Vehicle Electrical System, General Repair
...
Other materials:
Volkswagen Touran Owners Manual. Cleaning and caring for chrome and aluminium trim parts
First read and observe the introductory
information and safety warnings
Use a damp, clean, lint-free and soft cloth to clean the surfaces.
For heavy soiling use a special solvent-free cleaning
product.
Polish the chrome and aluminium trim parts using a soft, dry cloth.
NO ...
Volkswagen Touran Owners Manual. Checklist
The following actions must always be carried out in the given order
in preparation for filling a wheel :
In the event of a flat tyre, park your vehicle
on a flat and solid surface at a safe distance from the flow of traffic.
Apply the handbrake Braking, stopping and
parking Br ...
© 2016-2026 Copyright www.vwtouran.net | 0.0062

 Wiring Harness Repair Set - Hot Air Blower -VAS1978/14A
 Airbag and Belt Tensioner Wire Repair Information